This article explains how to print a ZPL file using a text editor and the Windows Generic Text Driver Printer.
In order to use the HME360 Web app for printing RFID tags with a AZ you must install a generic ZPL printer on the device from which you are printing.
To print a file that contains the ZPL command (the extension of the file is not important as long as it is possible to open the file with a text editor, it can be .txt, .zpl, .prn.), you can use the Generic Text Printer Driver provided by Windows.
Install the ZD500R Printer:
- Plug the USB Cable B (small rounded square tip) into the back of the printer and into a USB A port on your computer.
- Attach the power cable to the back of the printer.
- Turn on the Printer (Black Rocker Switch by the Power Cable on the back of the Printer.
- After the Printer finishes powering on, if the printer does not say ‘Ready’, Click the pause button once.
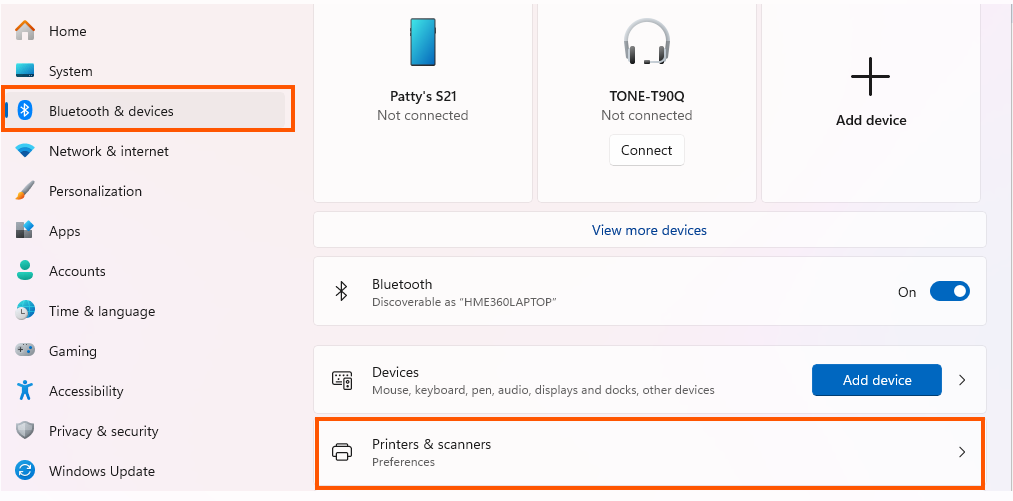
- Right-click the Windows Start Button.
- Click Settings.
- Click Bluetooth & devices on the left side and then Printers & scanners on the right side.
- Click Add device (blue button at top).
- Find Printer that is ZDesigner in it’s name and click Add.
- Follow steps using Windows Driver for the ZPL or Zebra Printer. If no driver is available in windows – Follow the steps in this scribe: Installing Printer with Downloaded Zebra Print Driver and Generic Print Driver
After installing the printer using the Windows driver, you can use this feature by installing a second instance of the same printer on the same port where the standard printer is already installed by following these steps:
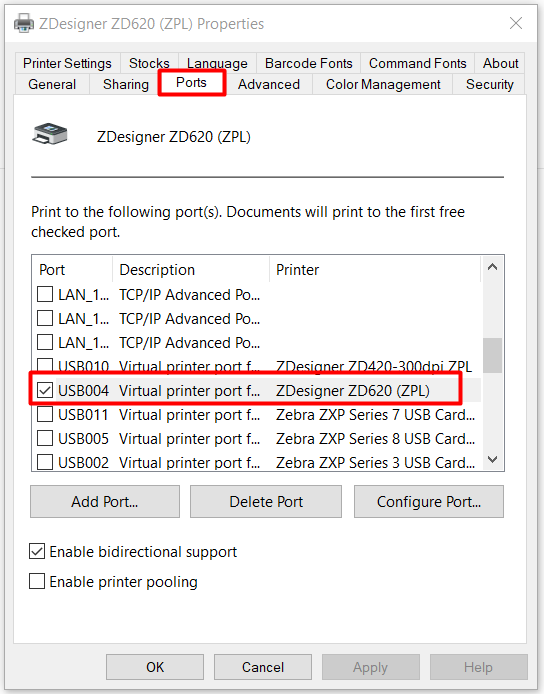
Check which port your computer is using to communicate with the printer:
- Right-click the Windows Start Button.
- Click Settings.
- Click Bluetooth & devices on the left side and then Printers & scanners on the right side.
- Click on ZDesigner Printer.
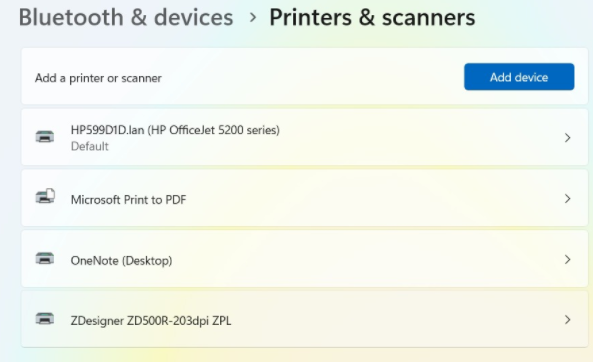
- Click on Printer Properties.
- Select the Ports tab and check for the selected port.
Proceed with the installation of the second instance of the printer by using the Generic Text Driver:
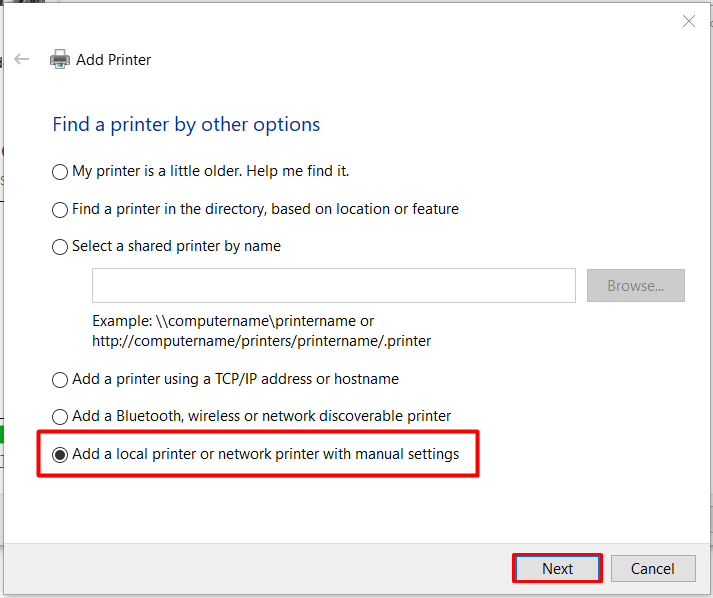
Click on ‘Add Device’ and after the computer finishes scanning, click ‘The printer that I want isn’t listed.’
Select the Add a local printer or a network printer with manual settings option, then click Next.
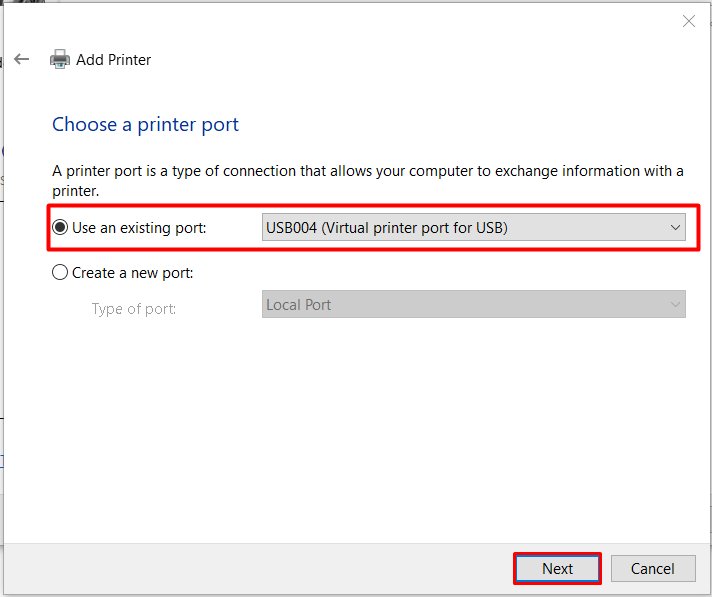
Select the Use an existing port option and select the same port where the printer is already installed from the drop-down menu. Click Next.
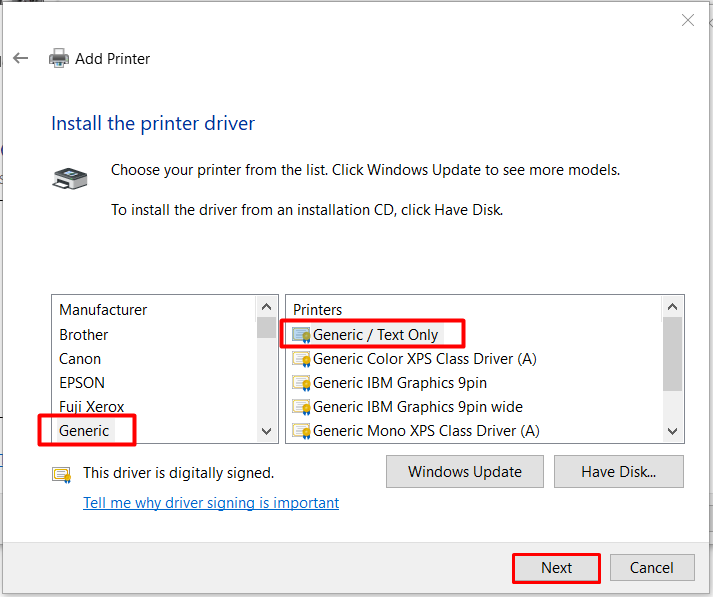
Select Generic as the Manufacturer and Generic / Text Only under Printers. Click Next.
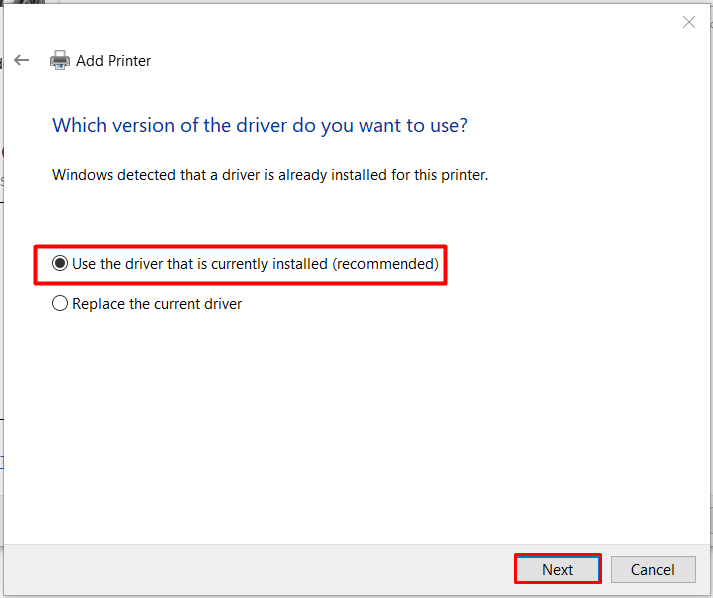
Select Use the driver that is currently installed (recommended) option and click Next.
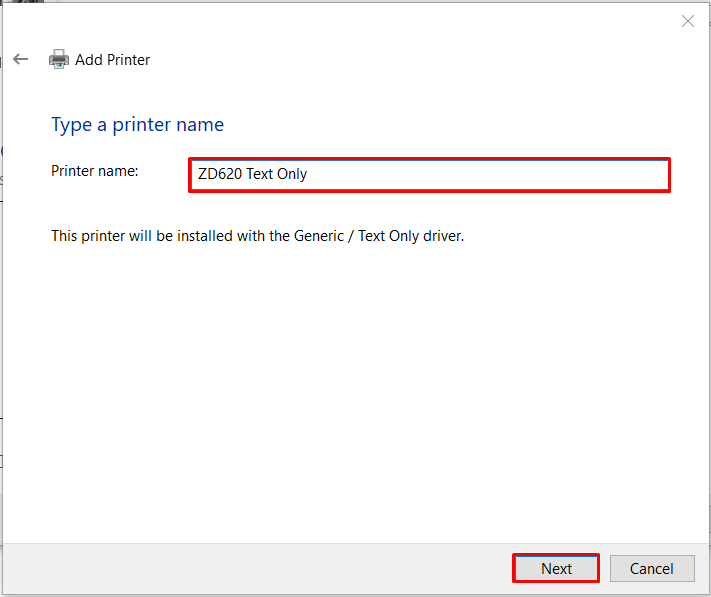
Chanage the printer’s name to ‘HME360 RFID Printer”, and click Next.
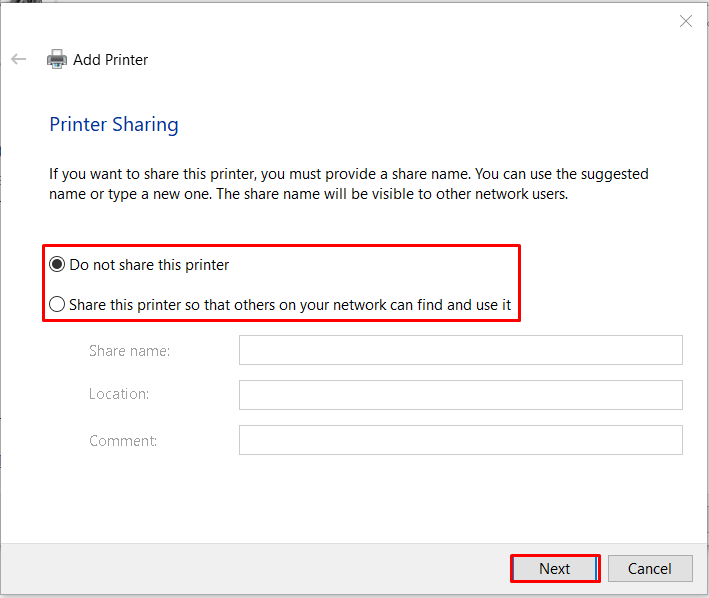
Select either to share or not to share the printer and click Next.
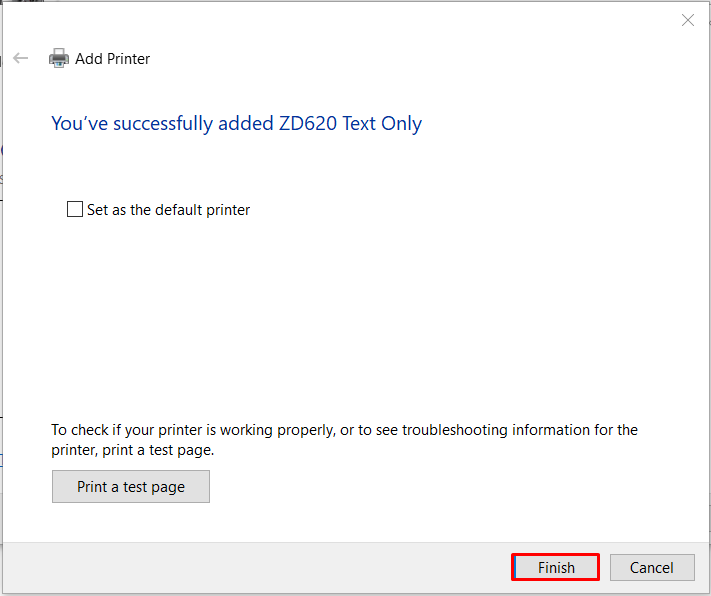
Now you have successfully added the printer of your choice. Click Finish to complete the installation.
You may need to perform Media Calibration and RFID Calibration.
Log in to the HME360 Website to use ‘Tag Print’ to test the printing of tags.